Welcome to the latest Release Update blog post.
Oh, the weather outside is frightful, but this StoreFeeder update's delightful... It's nearly Christmas and I personally am full of festive cheer after last years downer; in fact, I've been to so many Christmas markets I think I'm starting to lose count!
Speaking of markets, I hope all of your run-ups to Christmas have been fruitful and that the stress of getting orders out in time for Christmas won't consume any of you this year!
As per usual, our development elves have been working hard to bring you an exciting update this month. There has been a lot of work in the background but there have been some great updates and new features released in this update, the highlights of which are below:
Customs Declaration Category Input Changes

Customs declaration categories have to be displayed on all CN22 and CN23 customs documents.
In StoreFeeder at present, your default choices for these categories are saved on a company identity level and are assigned to orders depending on the values selected. This, however, can be improved by also providing the option to set these default category selections on a product level so that's exactly what we've done!
There are two ways to add default custom categories to your products:
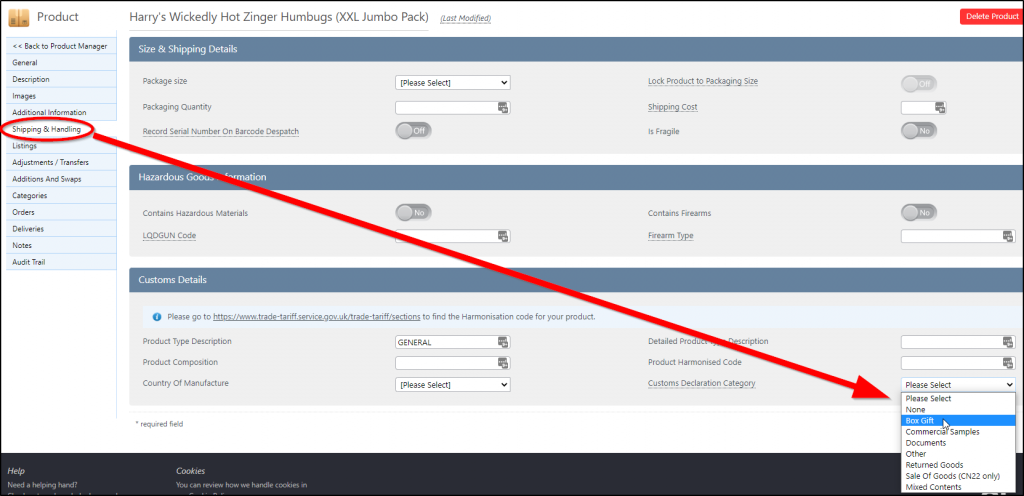
Individually: Simply edit the product and go to the "Shipping & Handling" tab on the left-hand side of the page. Once here, you'll see a section headed "Customs Details" at the bottom of the page; under that, you'll find a drop-down box titled "Customs Declaration Category" that will allow you to select the default category for this product.

In Bulk: Much like many of the other data fields on your products, customs categories can also be edited/added using the product import/export tool.
"So what happens if an order has two different products in it with conflicting categories?" I hear you ask. Well, in this case, the customs declaration category will be marked as "Mixed Content" so you shouldn't have to worry about it.
"And what happens if I haven't selected a customs declaration on a product that's in this order?" you also question. The answer is that if a product doesn't have a declaration category against it then the one (or more) selected on the company identity will be used instead. If there is nothing selected on the company identity either, it simply wont contribute towards the category selections on the CN22 so either, we'll use the selections from any other products in the order or, if there are no other products, we'll just leave it blank for you to fill in the good ol' fashioned way.
Default Warehouse for EPOS

Fantastic news for our EPOS users, you now have a way of choosing which warehouse (and warehouse zone for multi-stock location users!) EPOS orders will take their stock from first.
The first way of doing this is by setting a priority warehouse against the "phone channel" that you use for your EPOS orders. If you edit/view the integration you'll now see the options for default locations under the "Channel Specific Settings" section as shown below:

Once you've saved your changes you'll notice that, when you next place an EPOS order, the stock will be taken from the priority warehouse/zone that you just set on the phone channel. Of course, if there is no available stock in that warehouse, it will attempt to take it from another.
BluePark Delivery Confirmation Numbers

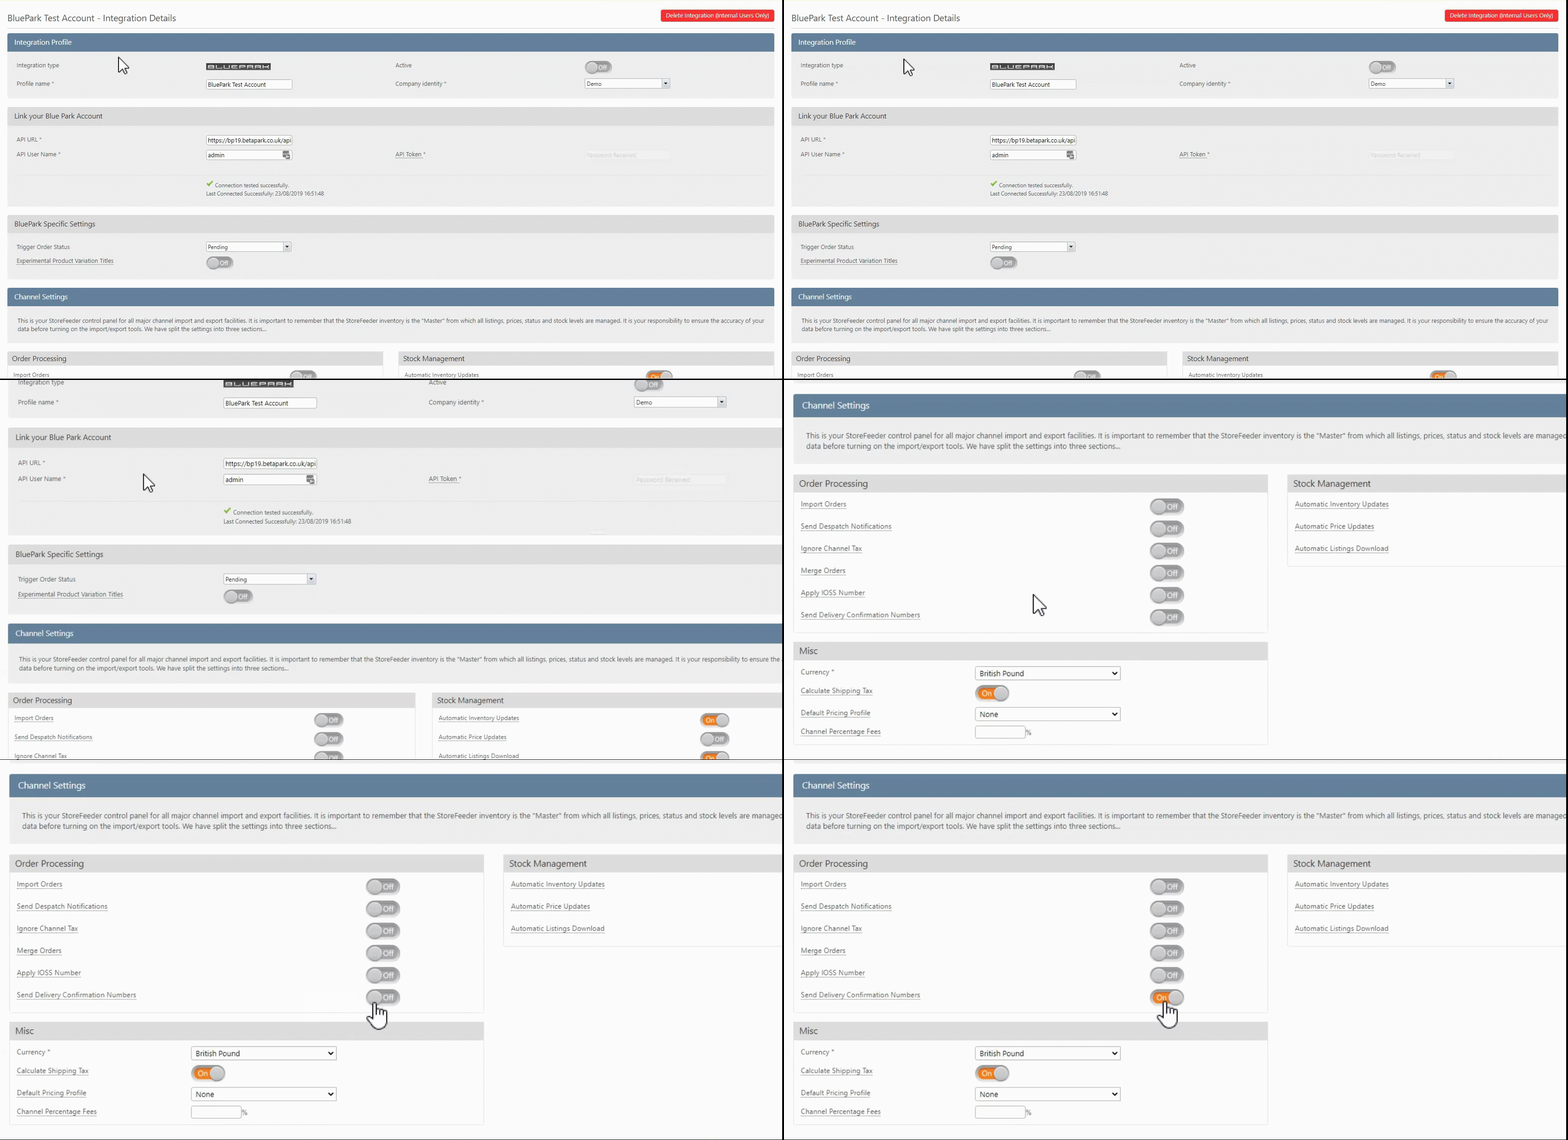
A short and sweet update for BluePark - you can now send a delivery confirmation number in place of a tracking number up to BluePark if your order is not being delivered by a tracked service.
If you'd like this to happen, you'll need to switch the option on within your BluePark integration. You'll just need to edit the integration and scroll down to the "Order Processing" section; there, you will see an option to switch on "Send Delivery Confirmation Number" as demonstrated below:

New Xero Accounting Export Types

Last, but certainly not least, we've added new accounting export types to our Xero integration. This is for a number of reasons, the most important simply being that we're able to send data to Xero in a much more efficient manner with these options in place, depending on how much you are wishing to send up of course. The other big reason is that this will allow our Xero users to have the option not to send certain unrequired data and flood their Xero account with things like product names if they aren't needed.
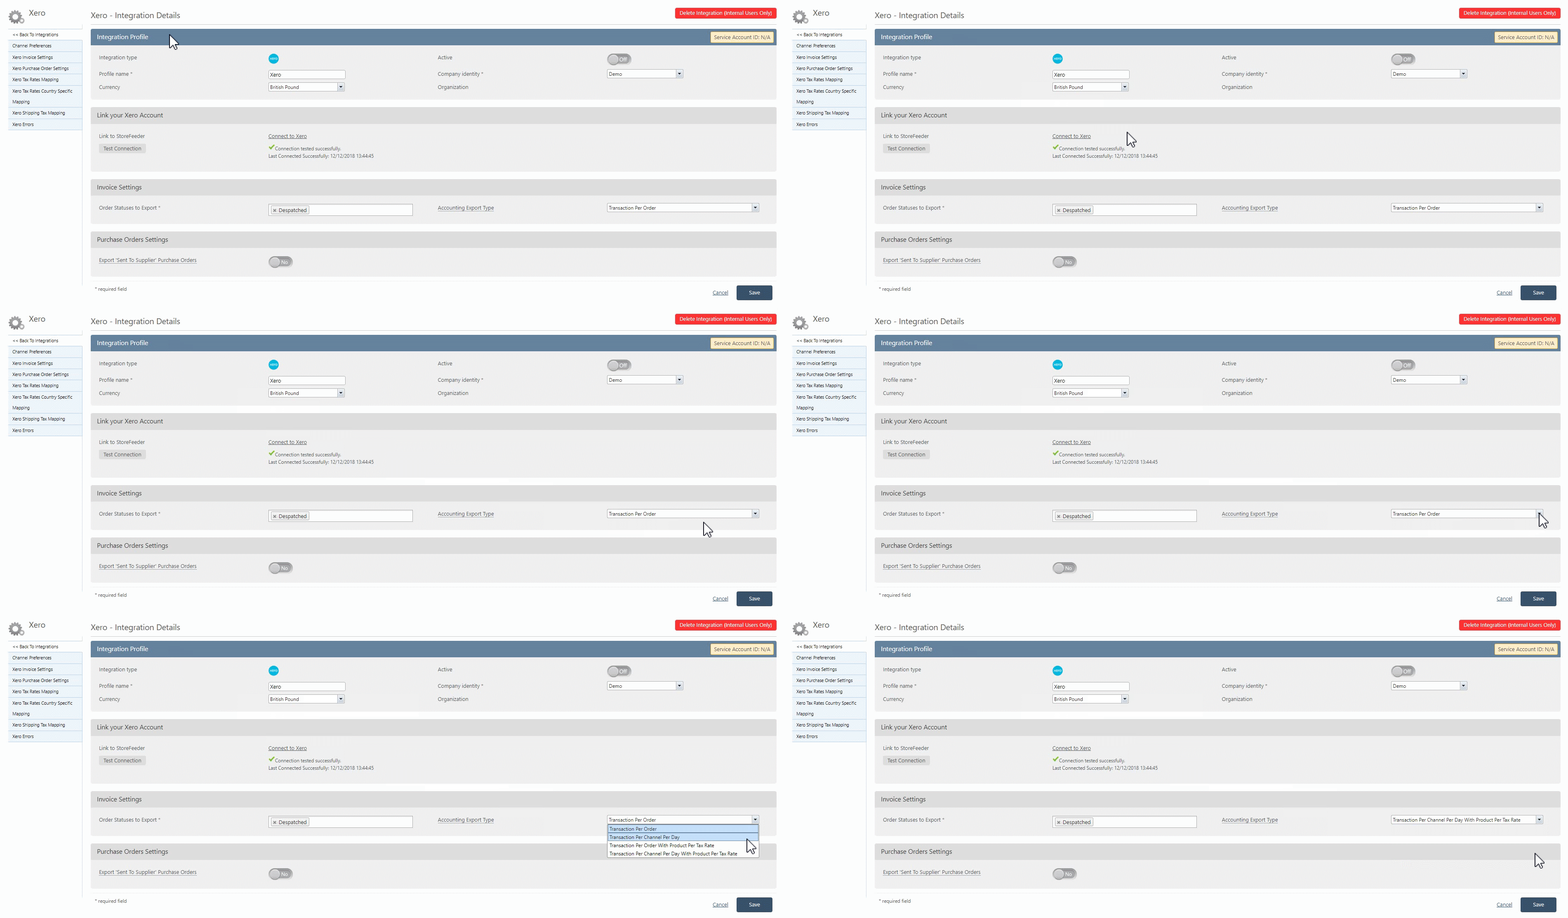
To select an accounting export type, simply edit your Xero integration and pick an option from the dropdown box titled "Account Export Type" found under the "Invoice Settings" section as shown below:

A brief overview of the options can be seen below:
- Transaction Per Order - Export orders without grouping
- Transaction Per Channel Per Day - Export orders grouped by Date/Channel/Currency
- Transaction Per Order With Product Per Tax Rate - Export orders grouped by Tax Rate
- Transaction Per Channel Per Day With Product Per Tax Rate - Export orders grouped by Date/Channel/Currency/Tax Rate
Finally….
There have been some great new features and fixes implemented in this release and we hope you find them useful in one way or another.
As always we’ll keep working hard to provide you with the best service we can.
From all of us here at StoreFeeder, happy selling.
The StoreFeeder Team

